Subscription Management
Page Background: In this document, we would discuss the subscription management function under account management.
How to access Subscription Management:
In order to access the account management you need to go to the following URL:
https:// yourdomain.com/admin/account/subscriptions
You need to have an account under this section, before you can access the subscription management features. If you are not logged in you would be redirected to login or signup page.
Subscription Management page
In this section, you will be able to view all your subscriptions (whether it is purchased/cancelled) as is shown in the screenshot below:
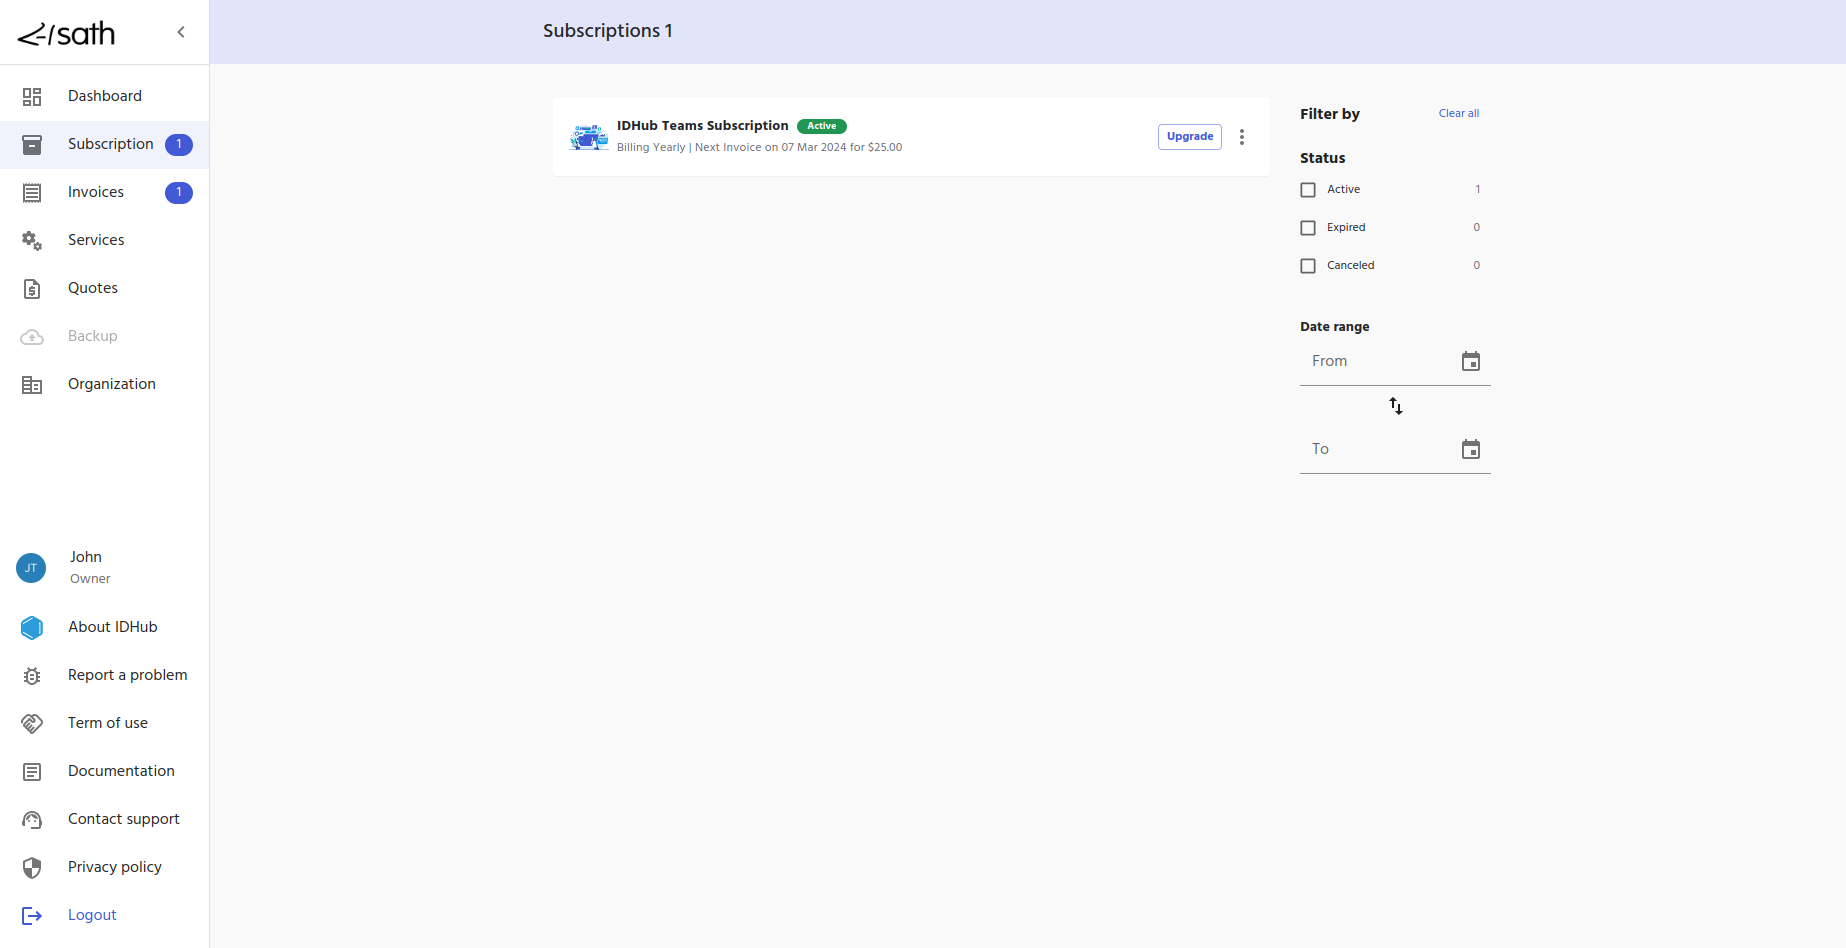
Each subscription card would have the following details:
Subscription name
Billing Cycle
Next Invoice due date
Price
Actions
Upgrade
Downgrade
Cancel

Actions possible for each subscription
Upgrade Action
To upgrade the number of users (user tiers) in your subscription, you need to click on the upgrade button. This will show you the next available user tier and the prorated amount at the bottom as shown in the screenshot below:

You can click on the drop-down at the bottom to see the list of user tiers that is available to upgrade. The next user tier available for upgrade is already highlighted and selected in the drop-down.
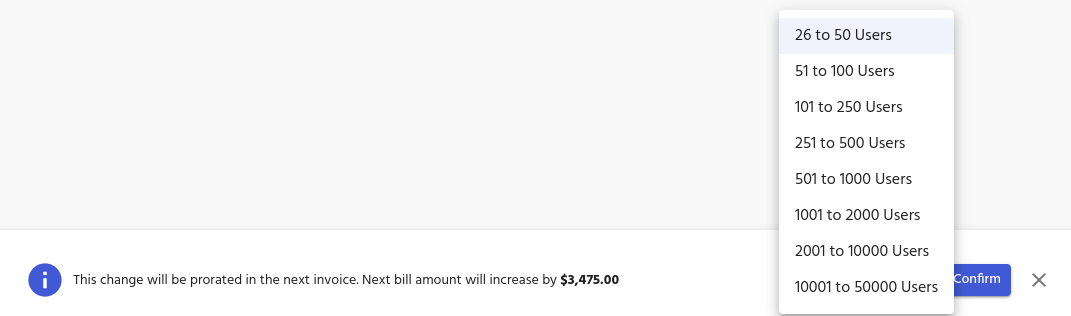
After selecting your desired user tier, you can click on the confirm button and your subscription will be upgraded and the invoice amount would be prorated in the next invoice. If you change your mind, you can click anywhere outside of the bottom section or click on the cross icon to close the section.
If you are already in the highest tier, then the upgrade button would be disabled.
Downgrade Action
To downgrade the number of users (user tiers) in your subscription, you need to click on the 3 dots menu and then click on the downgrade option. This will show you the next available user tier to be downgraded and the prorated amount at the bottom as shown in the screenshot below:

You can click on the drop-down at the bottom to see the list of user tiers that is available to downgrade. The next user tier available for downgrade is already highlighted and selected in the drop-down.

After selecting your desired user tier, you can click on the confirm button and your subscription will be downgraded and the invoice amount would be prorated in the next invoice. If you change your mind, you can click anywhere outside of the bottom section or click on the cross icon to close the section.
If you are already in the lowest tier, then the downgrade option would be disabled.
Cancellation Action
If you want to cancel your subscription, you need to click on the 3 dots menu and then click on the Cancel Subscription option. Then you will be prompted to enter the reason for the cancellation as is shown in the screenshot below:

After entering the reason for the cancellation, click on the button “Cancel Subscription” and then the subscription would be cancelled and you would be redirected to the account dashboard.
Filters available
There are filters in the right-hand side section of the page, which would help you to filter the list of subscriptions. The filters available are as follows:
Active
Expired
Cancelled

You can also filter the list of subscriptions based on date range as well as is shown in the screenshot below:
